Introduction To Serverless Security: Part 3 - Preventing Accidental Deletion
Avoid falling victim to the pitfall of accidentally deleting your critical data when using Serverless. Learn how to enable AWS CloudFormation termination protection.


"Did I just delete the database with all my customer data?!" you might say if you failed to enable the measure to prevent accidental deletion. We will explore how to avoid this pitfall in your Serverless environment.
Serverless Make It Really Easy to Deploy Your Environment—and Undeploy Too
The Serverless framework has made it extremely easy to deploy you functions, create databases, provision storage, and more with one deploy command. This is powerful and convenient, but the same goes for tearing down your deployment. (You may want to read the first article in this series, "Introduction To Serverless Security: Part 1 - Dependencies," to get a quick overview on serverless environments.)
Deploying Your Environment
This example deployment file shows how you can configure the resources you want in one configuration.
service: secjuice-example

provider:
  name: aws
  runtime: nodejs8.10
  stage: ${opt:stage, 'dev'}
  region: us-east-1

functions:
  exampleFunction:
    handler: functions/example.handler
    events:
      - http:
          path: secjuice/example
          method: get


resources:
  Resources:
    S3BucketFiles:
      Type: AWS::S3::Bucket
      Properties:
      	# must be globally unique across all AWS
        BucketName: secjuice-example-files
    CustomersTable:
      Type: AWS::DynamoDB::Table
      Properties:
        TableName: secjuice-example-customers
        AttributeDefinitions:
          - AttributeName: AccountId
            AttributeType: S
        KeySchema:
          - AttributeName: AccountId
            KeyType: HASH
        ProvisionedThroughput:
          ReadCapacityUnits: 1
WriteCapacityUnits: 1serverless.yml configuration file.The serverless.yml configuration creates the following upon deployment to Amazon Web Services (AWS):
- One function called
secjuice-example-dev-exampleFunctionusing AWS Lambdas; it automatically appends the "service" and "stage" to the lambda function name
- One file storage system called
secjuice-example-filesusing AWS Simple Storage Service (S3)
- One database called
secjuice-example-customersusing AWS DynamoDB.

To start the deploy, you navigate to the project folder where the serverless.yml file exists and run the following command:
sls deployWow! Deploying the stack is really simple.
Undeploying (i.e. Removing) Your Enviroment
As simple as it was to deploy, the same applies to removing your environment. This is a double-edge sword. You may want to remove your environment quickly when developing for multiple reasons, but you might not want that same ease with your production environment (and important data).
To start the removal, you navigate to the project folder where the serverless.yml file exists and run the following command:
sls removeIt is scary how easy it was to delete the entire stack.
Issuing this command deleted the following:
- The DynamoDB database

- The S3 bucket
- The Lambda function
How can you protect your data from an accidental (or maliciously intended) deletion?
Strategies to Protect Your Data From Accidental Deletion
Separating Function and Data Stacks
You can separate your functions and data into two stacks. I did accomplished this by creating two sub-folders "data" and "functions", each with its own `serverless.yml` configuration file.
service: secjuice-example-functions

provider:
  name: aws
  runtime: nodejs8.10
  stage: ${opt:stage, 'dev'}
  region: us-east-1

functions:
  exampleFunction:
    handler: example.handler
    events:
      - http:
          path: secjuice/example
          method: get
functions/serverless.yml configuration file.service: secjuice-example-data
provider:
name: aws
runtime: nodejs8.10
stage: ${opt:stage, 'dev'}
region: us-east-1
resources:
Resources:
S3BucketFiles:
Type: AWS::S3::Bucket
Properties:
# must be globally unique across all AWS
BucketName: secjuice-example-files
CustomersTable:
Type: AWS::DynamoDB::Table
Properties:
TableName: secjuice-example-customers
AttributeDefinitions:
- AttributeName: AccountId
AttributeType: S
KeySchema:
- AttributeName: AccountId
KeyType: HASH
ProvisionedThroughput:
ReadCapacityUnits: 1
WriteCapacityUnits: 1data/serverless.yml configuration file.To start the deploy, you navigate to the project folder where the original serverless.yml file existed and run the following commands:
cd functions
sls deploy
cd ../data
sls deploy
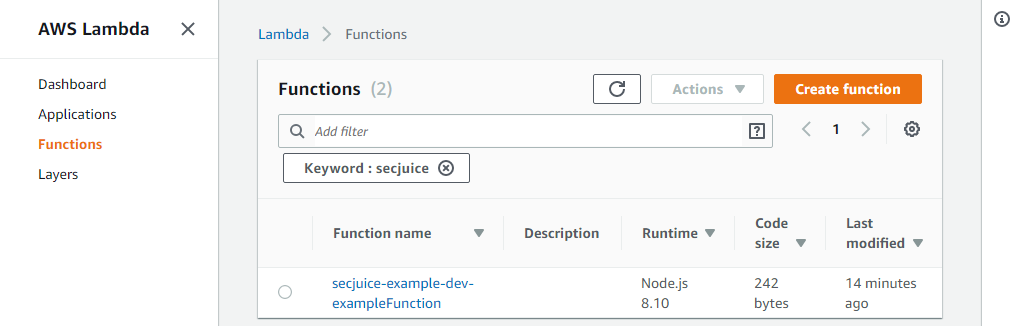
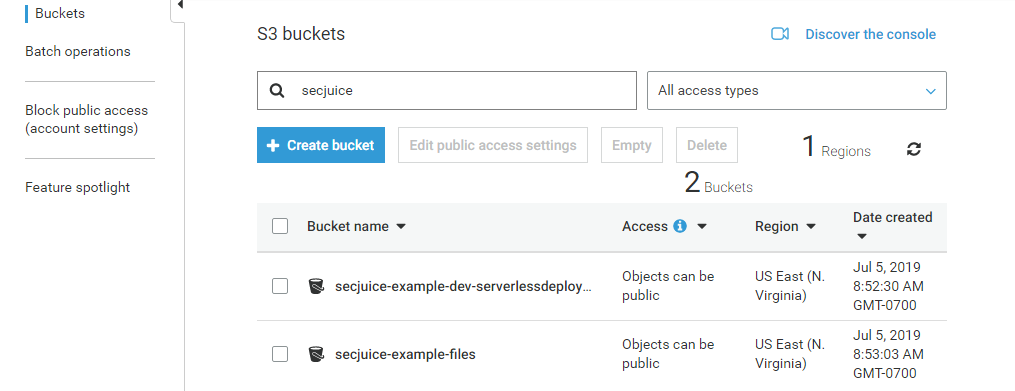
cd ..These two deploys did the following:
- Created two CloudFormation stacks
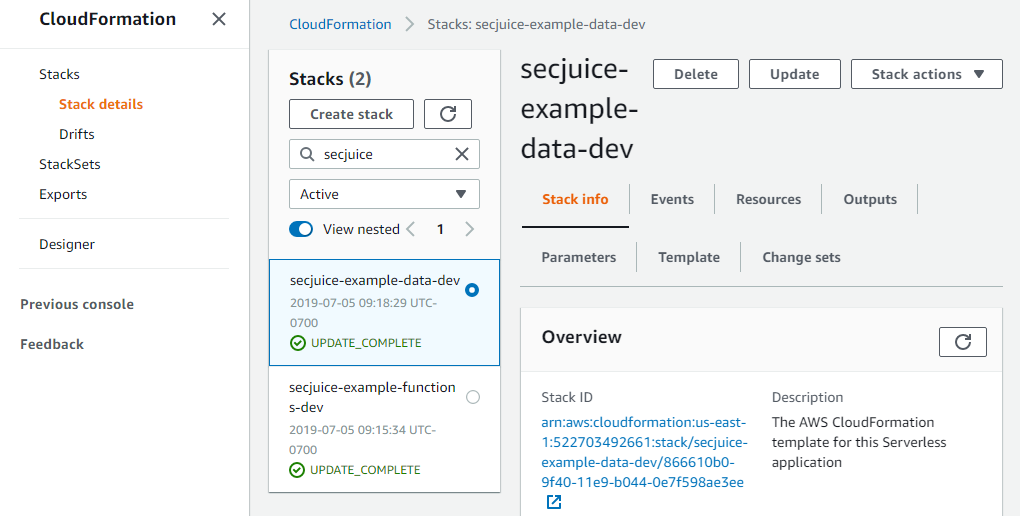
- Created the Lambda function
- Created the DynamoDB table
- Created the S3 buckets
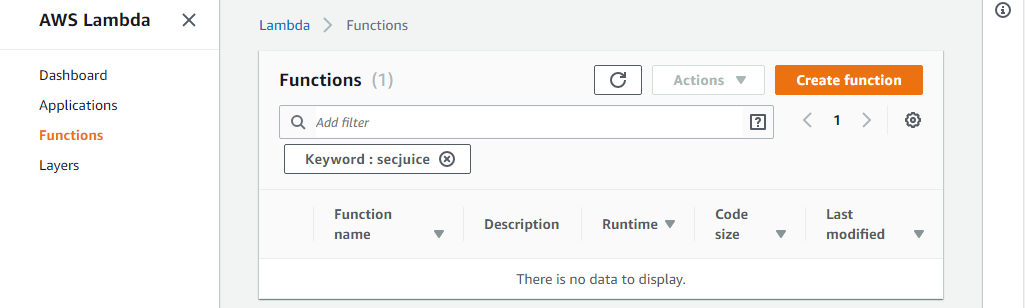
Now lets remove on the functions stack.
cd functions
sls remove
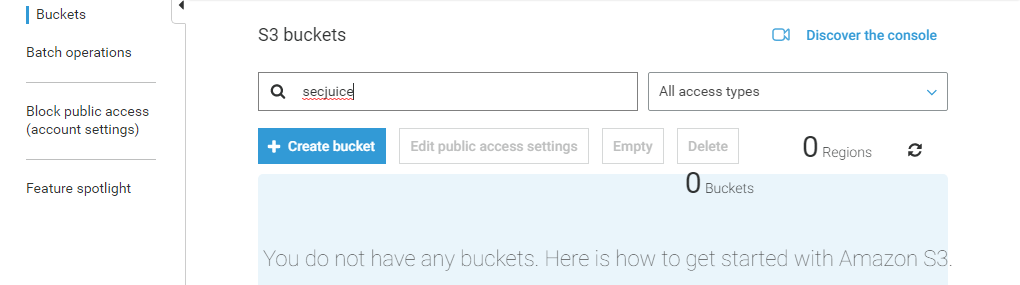
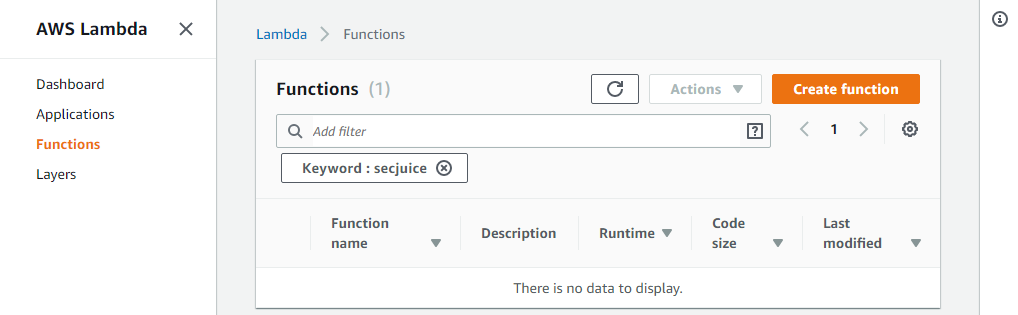
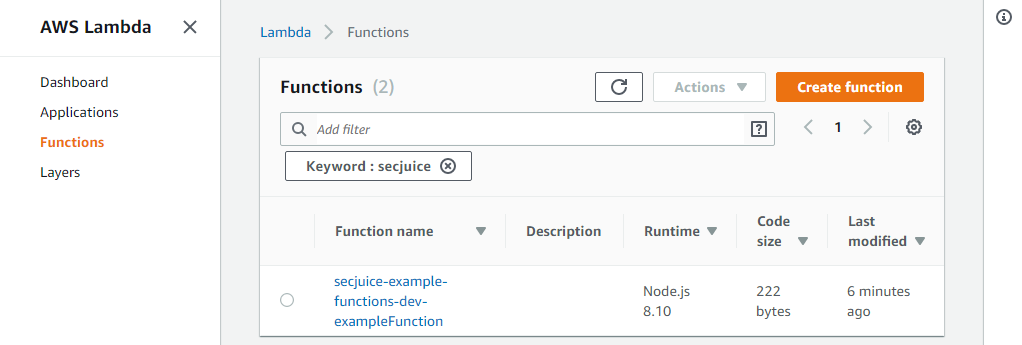
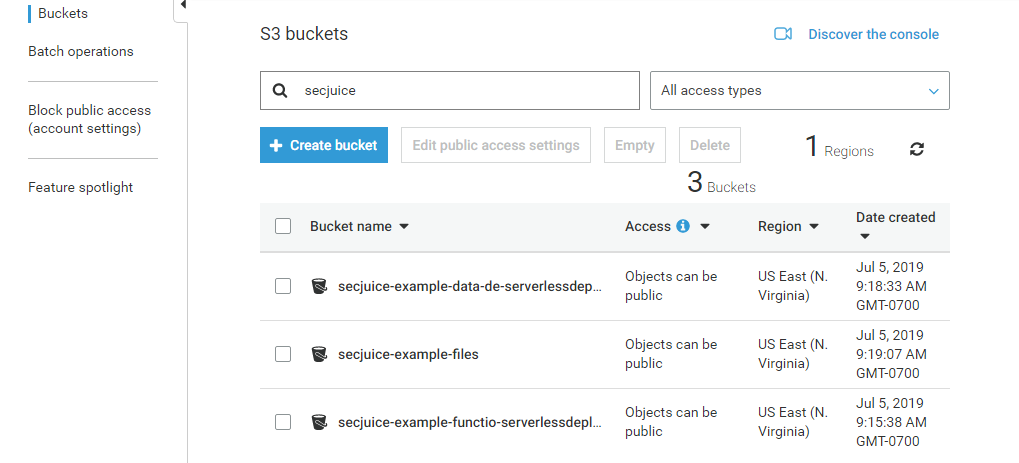
cd ..You will notice only the Lambda function and the S3 bucket associated with the functions stack is removed:
- Only the data CloudFormation stack remains.
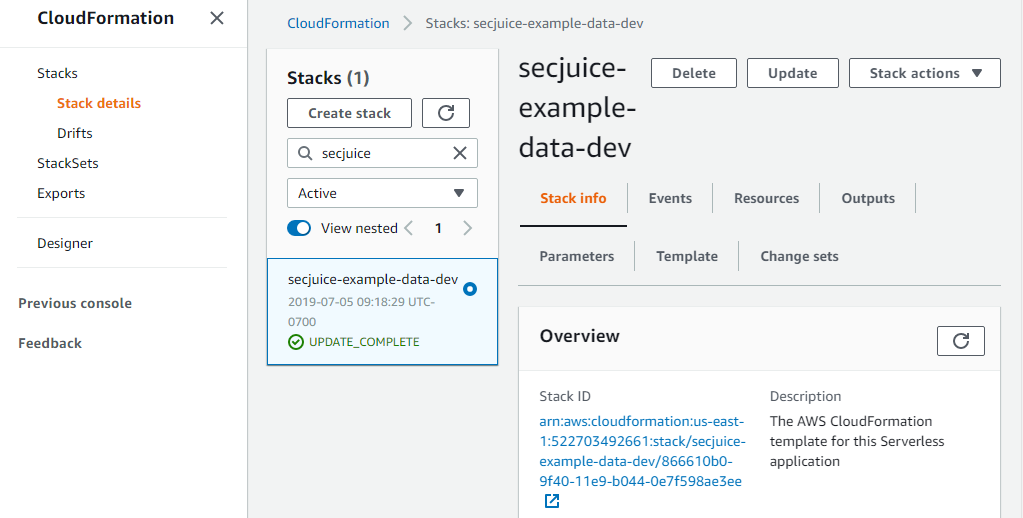
- Only the data stack S3 buckets remain.

- The DynamoDB table remains.
- There is no Lambda function.
This approach allows a developer to work on the Lambda functions without worrying about the effect it has to the data.
Enabling Termination Protection
AWS CloudFormation has a nice feature to protect against accidental termination: it is called "termination protection." Termination protection is disabled by default. To enable it:
- Go to the stack
- Click "Stack actions"
- Click "Edit termination protection"
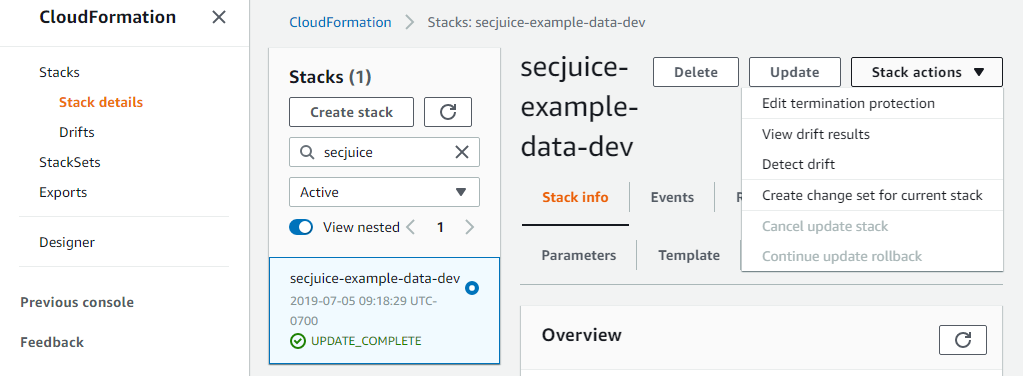
- Click "Enabled"
- Click "Save"
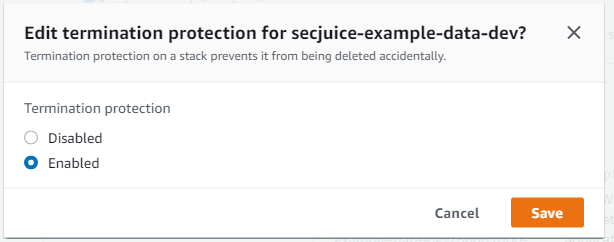
Now when you try to remove the data stack you will get the following error:
Serverless: Getting all objects in S3 bucket...
Serverless: Removing objects in S3 bucket...
Serverless: Removing Stack...
Serverless Error ---------------------------------------
Stack [secjuice-example-data-dev] cannot be deleted while TerminationProtection is enabledEnabling termination protection via the web console is very simple, but can be time consuming if you have a lot of stacks to manage. I recommend enabling it as part of the Serverless deploy.
At the time of this writing, the Serverless framework version 1.x has no support for termination protection. You need to use a Serverless plugin to add that capability. You can use one of two plugins:
The "serverless-stack-termination-protection" plugin
This plugin enables termination protection during deploy without any additional configuration.
To install it, run the following commands in your project folder:
cd data
npm install --save-dev serverless-stack-termination-protectionOpen the serverless.yml configuration file for the data stack and add the plugin.
service: secjuice-example-data

provider:
  name: aws
  runtime: nodejs8.10
  stage: ${opt:stage, 'dev'}
  region: us-east-1

resources:
  Resources:
    S3BucketFiles:
      Type: AWS::S3::Bucket
      Properties:
      	# must be globally unique across all AWS
        BucketName: secjuice-example-files
    CustomersTable:
      Type: AWS::DynamoDB::Table
      Properties:
        TableName: secjuice-example-customers
        AttributeDefinitions:
          - AttributeName: AccountId
            AttributeType: S
        KeySchema:
          - AttributeName: AccountId
            KeyType: HASH
        ProvisionedThroughput:
          ReadCapacityUnits: 1
          WriteCapacityUnits: 1
plugins:
- serverless-stack-termination-protectiondata/serverless.yml configuration file.You will see the following output when you deploy the data stack:
serverless-stack-termination-protection: Successfully enabled termination protectionDisclosure: I wrote the "serverless-stack-termination-protection" plugin.
The "serverless-termination-protection" plugin
This plugin also enables termination protection during deploy, but offers additional configuration options to deploy to specific stages. For example, you can specify to enable termination protection only for your "prod" stage/environment.
To install it, run the following commands in your project folder:
cd data
npm install --save-dev serverless-termination-protection aws-sdkOpen the serverless.yml configuration file for the data stack and add the plugin.
service: secjuice-example-data

provider:
  name: aws
  runtime: nodejs8.10
  stage: ${opt:stage, 'dev'}
  region: us-east-1

resources:
  Resources:
    S3BucketFiles:
      Type: AWS::S3::Bucket
      Properties:
      	# must be globally unique across all AWS
        BucketName: secjuice-example-files
    CustomersTable:
      Type: AWS::DynamoDB::Table
      Properties:
        TableName: secjuice-example-customers
        AttributeDefinitions:
          - AttributeName: AccountId
            AttributeType: S
        KeySchema:
          - AttributeName: AccountId
            KeyType: HASH
        ProvisionedThroughput:
          ReadCapacityUnits: 1
          WriteCapacityUnits: 1

plugins:
  - serverless-termination-protection

custom:
  serverlessTerminationProtection:
    stages:
- proddata/serverless.yml configuration file.You will see the following output when you deploy the data stack:
Serverless: STP: Adding termination protection to secjuice-example-data-dev..
Serverless: STP: Checking if termination protection should be added..
Serverless: STP: Stages to check: prod
Serverless: STP: Not applying termination protection for dev stageWith either plugin, your data stack is now protected, unless you specify to exclude a stage.
Conclusion
Consider separating your stacks and enabling termination protection on the data stack at a minimum to protect your application from accidental deletion.
Before You Go
Other Articles in this Series
- Introduction To Serverless Security: Part 1 - Dependencies
- Introduction To Serverless Security: Part 2 - Input Validation
Source
The source files are available at https://github.com/miguel-a-calles-mba/secjuice/tree/master/termination-protection-examples for your enjoyment.
A Note from the Author
Join my mailing list to get updates on my writings, my short stories, my upcoming books, and cybersecurity news. Visit https://miguelacallesmba.com/subscribe to join.
Stay secure, Miguel