Write-up-THM-TMUX
Learn how to use tmux to manage multiple terminals.


Learn to use and interact with TMUX, a great Linux Utility for managing your terminal windows

Tmux (Terminal Multiplexer) is a handy tool that allows you to open multiple windows in a single terminal window. It also allows keeping track of sessions/window terminals and manages them by going back and forth through different session number/name. The session can be terminated at any time you want. Tmux is a great tool if you work with multiple terminal windows and want to see all of your work under one window. This write-up is based on the TMUX room on TryHackMe and goes through the number of shortcuts that can be used while using TMUX for multiple terminal window management and tracking.
P.S: You can use the cheat sheet of TMUX to solve the challenges in the room. At first, you might get overwhelmed but don't worry. With practice, you would definitely get hold of these shortcuts
Objectives
Getting acquainted with the TMUX and its shortcuts to navigate through different terminal windows, making new session windows, detaching from them, etc
Learning outcomes
- Learn to create new sessions using TMUX
- Attaching and detaching sessions
- Creating windows and navigating through them
- Get to know different key bindings etc
Task 1
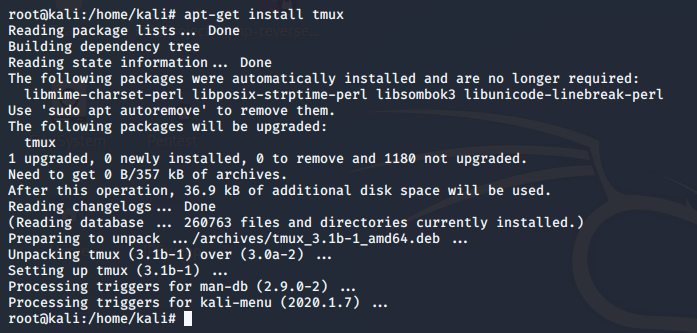
First thing first, we need to install TMUX on our OS. You can install it on any Linux distro you want to. I usually work in Kali Linux, so I would be installing it on this.
Task 2
Now that we have installed tmux, let's launch it. The command is pretty simple, and you would most likely find the command in the cheat sheet. As soon as you write tmux in the terminal and press enter, you will notice a blue bar at the bottom of your terminal, as shown below

Task 3–10
Task 3 through 10 are related to the commands. You can refer to the cheat sheet until you become comfortable in using the commands without looking at any reference material.
All the tmux commands start with a keyboard button, i.e. control. You will see that the ctrl key is pressed every time a shortcut is used. Another key that is necessary to be used with ctrl is “b”. You must note that these keys should be pressed every time as a prefix to other shortcuts that we would go through in the upcoming challenges.
When we want to detach a session like the one we created before using tmux we would simply press ctrl+b D, and this would exit the current tmux session with a small prompt that tmux has been exited.
If we want to list all our tmux sessions, we will use tmux ls in order to see all the sessions as shown below.

Here the session name is denoted by a number that is to the left. There could be a name of the session, too, if we create a tmux session using a name. If not, then by default, it is assigned a number. In order to interact with a specific session, we would use tmux a -t 0(Session name)
In order to make a new window in this session, we will use ctrl + b C
So now that we have a lot of interaction with session and windows, let's make this to use and fill in some information.
Task 11
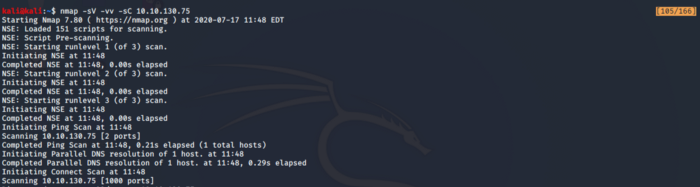
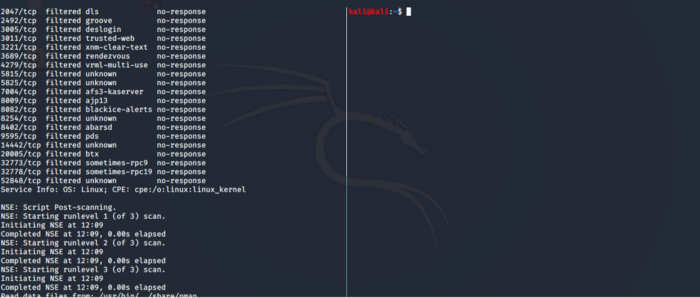
Let's scan the target machine with Nmap using the flags as seen below.

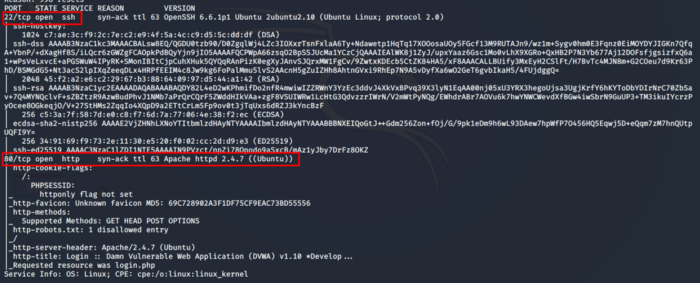
Task 12
As we can see from the above output, there is a lot of information to store, and it won't fit in one screen. For that, we would use ctrl + [. Doing so will allow us to scroll through the screen using the arrow keys. Notice a highlighted section on the top right corner, which shows the number that indicates that you can scroll up and down.
Task 13–15
If we want to go to the top of the page, we could use g with a combination of ctrl + that is used with every shortcut in tmux. Similarly, if we want to navigate to the bottom we press G. In order to leave the copy mode we would simple press q
Task 16
What if I was working with multiple windows and wanted to split the window so that I could open fewer window terminals at a time. In that case I would use ctrl + b % in order to split the screen vertically, as shown below.
What if I wanted to split the screen horizontally, I would use " with the essential combination
Task 18 –23
Lets us play around with these windows a bit, so in order to navigate between these split-screens, use ctrl + arrows keys. In order to resize these screens press, and hold the combo keys and arrow keys. In order to kill a pane after we no longer require it, we would use X in combination with the combo key. Use exit in order to terminate a session.
In order to get a session named neat as asked in the task, use tmux new -s neat.
Conclusion
With the last task done, this concludes our walkthrough for this room. Tmux is a pretty handy tool when you are using multiple windows and want to keep track of your sessions, especially terminal windows. It allows easy access to your terminal windows and allows you to work more efficiently without creating a fuss through multiple terminal windows.
I hope you liked reading through my write-up. If you like my write-ups and want more of such stuff, do share with the community. You can also support me here on Patreon.
About Me
I am an Information Security enthusiast pursuing my Master’s in Information Security and trying to get into a full-time cybersecurity career. You can follow for more write-ups and walkthroughs here.
